
Instruction Manual Empava EMPV-24WOC02 Electric Oven
The Empava EMPV-24WOC02 Electric Oven Manual will provide you with information on the specifications and features of the Oven, in one easy-to-read document.
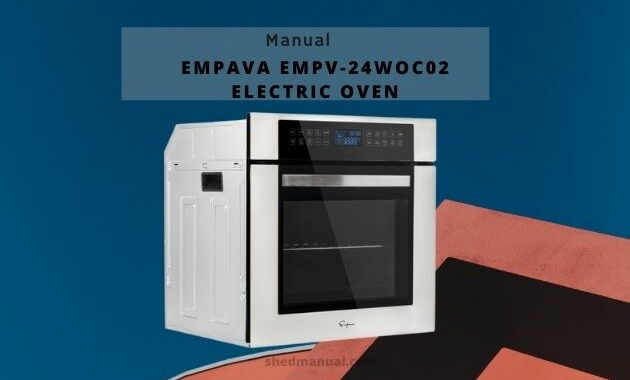
We know you are happy now that you have purchased the Empava EMPV-24WOC02 Oven, this is a great electric Oven. High quality and strong. We recommend that you read the manual so that you can use this electric oven properly. There are many features that you should know when cooking.
We’ll provide some excerpts from the manual’s docs below. So you know a little about the actual contents of the manual.
Installation
- The cooking space should be well-ventilated, dry, and well-ventilated. Easy access to all control elements should be guaranteed while installing the oven.
- This is a built-in oven with a back wall and one sidewall that may be positioned against a wall or a high piece of furniture. On fitted furniture, a heat-resistant adhesive (215°F) must be used to apply the coating or veneer. This prevents the coating from deforming or peeling away from the surface.
- Make an aperture for the oven to be installed using the dimensions shown in the diagram.
- Connect the oven to the mains supply after making sure the mains plug is unplugged.
- Insert the oven completely into the aperture, making that the four screws in the diagram’s indicated locations do not fall out.
Make Electrical Connection
A neutral (white) power supply wire and a cabinet-connected green(or bare)ground wire are braided together in this oven.
- Turn off the power.
- Feed the flexible conduit into the cabinet through the aperture.
- If a junction box cover is present, remove it.
- Connect the junction box using a UL-listed or CSA-approved conduit connection.
- Use a UL-certified or CSA-approved conduit connection to connect the flexible conduit from the oven to the junction box.
- Conduit connection screens should be tightened.
- To finish the installation for your kind of electrical connection, see “Electrical Connection Options.”
Cleaning And Maintenance
You may have a considerable impact on the continued fault-free functioning of your appliance by ensuring appropriate cleaning and maintenance of your stove.
Before you begin cleaning, make sure the stove is turned off and that all knobs are set to the “OFF” position. Wait until the cooker has totally cooled before cleaning it.
Caution! Adjust the cover (simply push it with your thumb) to protect the sharp blade at all times. There is a risk of injury when using this instrument, therefore use caution and keep it out of the reach of minors.
Appropriate mild cleaning or washing products, such as any form of liquids or emulsions for fat removal, are advised. Special cleaning solutions like COLLO Luneta, Sidol Stahlglanz, Stahl-Fix for washing and cleaning, and Cera Fix for maintenance are advised in particular. If the prescribed solutions are not available, a warm water solution with a little dishwashing liquid or stainless steel sink cleaning products should suffice.
Oven
- After each usage, the oven should be cleaned. When cleaning the oven, make sure the lights are turned on so you can see the surfaces better.
- Only the oven chamber should be cleaned. With a modest bit of washing-up liquid and warm water.
- Wipe the oven chamber dry after cleaning it.
Caution! When cleaning and maintaining the glass front panel, avoid using cleaning solutions that include abrasive elements.
Steam Cleaning
- Fill a bowl halfway with water (1 glass) and set it in the oven on the first level from the bottom.
- Shut the oven door.
- Set the temperature knob to 125 degrees Fahrenheit and the function knob to the bottom heater.
- For around 30 minutes, preheat the oven chamber.
- Open the oven door, clean the inner chamber with a cloth or sponge, then wash with warm water and dish soap. Caution! Steam cleaning may leave moisture or water residues underneath the stove.
- Wipe the oven chamber dry after cleaning it.
Door removal
It is possible to remove the door to get easy access to the oven chamber for cleaning. Tilt the hinge’s safety catch upwards to do this. Close the door gently, then raise and drag it away from you.
To reinstall the door on the cooker, reverse the process. When installing the hinge, make sure the notch of the hinge is properly aligned with the protrusion of the hinge holder. The safety catch should be gently lowered once the oven door has been installed. If the safety catch is not set, the hinge may be damaged when the door is closed.
Removal of the internal glass panel
Remove the plastic latch from the top corner of the door by unscrewing and unfastening it. After that, remove the glass from the second obstructing mechanism. Insert and block the glass panel after cleaning, and screw in the locking mechanism.
That’s all we can say for now. If you need complete details on how to operate the Empava EMPV-24WOC02 Electric Oven, look no further. Download the complete guide by clicking download the pdf document below. Hopefully, you can cook well, and your oven will last for decades.
