
Craftsman SB410 CMXGBAM1054541 User Manual
We will provide a comprehensive document user manual Craftsman CMXGBAM1054541 SB410 24-in 208-cc Snow Blower to explain the ins and outs of a lawn mower.
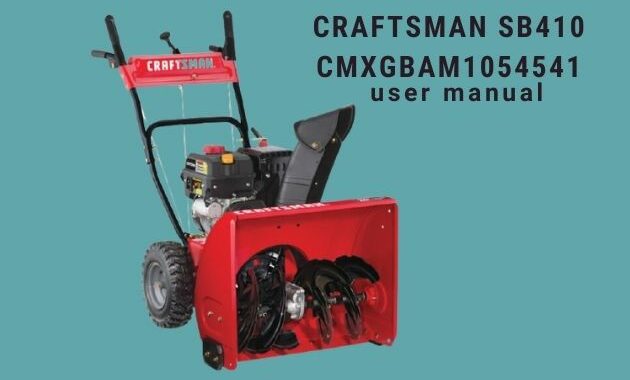
Have you recently purchased a Craftsman SB410 CMXGBAM1054541 lawn mower? Congratulations on your getting high quality equipment. Will help you clean the home page perfectly.
Are you familiar with this lawn mower? This tool has many features that you may not know about. To help you use the lawn mower properly. Take a look at the summary of the Craftsman SB410 CMXGBAM1054541 user guide to see what’s available to you.
Safety Instructions
Training
- Read, understand, and follow all instructions on the machine and in the manual(s) before attempting to assemble and operate. Failure to do so can result in serious injury to the operator and/or bystanders. Keep this manual in a safe place for future and regular reference and for ordering replacement parts.
- Be familiar with all controls and their proper operation. Know how to stop the machine and disengage them quickly.
- Never allow children under 14 years of age to operate this machine. Children 14 and over should read and understand the instructions and safe operation practices in this manual and on the machine and be trained and supervised by an adult.
- Never allow adults to operate this machine without proper instruction.
- Thrown objects can cause serious personal injury. Plan your snow-throwing pattern to avoid discharge of material toward roads, bystanders and the like. • Keep bystanders, pets and children at least 75 feet from the machine while it is in operation. Stop machine if anyone enters the area.
- Exercise caution to avoid slipping or falling, especially when operating in reverse
Preparation
- Thoroughly inspect the area where the equipment is to be used. Remove all doormats, newspapers, sleds, boards, wires and other foreign objects, which could be tripped over or thrown by the auger/impeller.
- Always wear safety glasses or eye shields during operation and while performing an adjustment or repair to protect your eyes. Thrown objects which ricochet can cause serious injury to the eyes.
- Do not operate without wearing adequate winter outer garments. Do not wear jewelry, long scarves or other loose clothing, which could become entangled in moving parts. Wear footwear which will improve footing on slippery surfaces.
- Use a grounded three-wire extension cord and receptacle for all machines with electric start engines.
- Disengage all control levers before starting the engine.
- Adjust collector housing height to clear gravel or crushed rock surfaces.
- Never attempt to make any adjustments while the engine is running, except where specifically recommended in the operator’s manual.
- Let the engine and machine adjust to outdoor temperature before starting to clear snow.
Maintenance & Storage
- Never tamper with safety devices. Check their proper operation regularly. Refer to the maintenance and adjustment sections of this manual.
- Before cleaning, repairing, or inspecting the machine disengage all control levers and stop the engine. Wait until the auger/impeller comes to a complete stop. Disconnect the spark plug wire and ground against the engine to prevent unintended starting.
- Check bolts and screws for proper tightness at frequent intervals to keep the machine in safe working condition. Also, visually inspect the machine for any damage.
- Do not change the engine governor setting or over-speed the engine. The governor controls the maximum safe operating speed of the engine.
- Snow thrower shave plates and skid shoes are subject to wear and damage. For your safety protection, frequently check all components and replace with original equipment manufacturer’s (OEM) parts only as listed in the Parts pages of this operator’s manual. Use of parts which do not meet the original equipment specifications may lead to improper performance and compromise safety!
- Check control levers periodically to verify they engage and disengage properly and adjust, if necessary. Refer to the adjustment section in this operator’s manual for instructions.
- Maintain or replace safety and instruction labels, as necessary.
- Observe proper disposal laws and regulations for gas, oil, etc. to protect the environment.
- Prior to storing, run the machine a few minutes to clear snow from the machine and prevent freeze up of auger/impeller.
- Never store the machine or fuel container inside where there is an open flame, spark or pilot light such as a water heater, furnace, clothes dryer etc.
- Always refer to the operator’s manual for proper instructions on off-season storage.
- Check fuel line, tank, cap, and fittings frequently for cracks or leaks. Replace if necessary.
- Do not crank the engine with the spark plug removed.
- According to the Consumer Products Safety Commission (CPSC) and the U.S. Environmental Protection Agency (EPA), this product has an Average Useful Life of seven (7) years, or 60 hours of operation. At the end of the Average Useful Life the machine is inspected annually by an authorized service dealer to ensure that all mechanical and safety systems are working properly and not worn excessively. Failure to do so can result in accidents, injuries or death.
Service And Maintenance
Changing Engine Oil
NOTE: Change the engine oil after the first 5 hours of operation and once a season or every 50 hours thereafter.
- Drain fuel from the tank by running the engine until the fuel tank is empty. Be sure the fuel fill cap is secure.
- Place a suitable oil collection container under the oil drain plug.
- Remove oil drain plug and washer (if equipped). See 54.
- Tip unit to drain oil into the container. Used oil must be disposed of at a proper collection center.
- Reinstall the drain plug and washer (if equipped) and tighten it securely.
- Refill with the recommended oil and check the oil level. See Recommended Oil Usage chart.
- Reinstall the oil filler cap/dipstick securely.
Drive Control
When the drive control is released and in the disengaged “up” position, the cable should have very little slack. It should NOT be tight. Also, if there is excessive slack in the drive cable or if the unit experiences intermittent drive while using, the cable may need to be adjusted. Check the adjustment of the drive control as follows:
- With the drive control released, push the snow blower gently forward. The unit should roll freely.
- Engage the drive control and gently attempt to push the snow blower forward. The wheels should not turn. The unit should not roll freely.
- With the drive control released, move the shift lever back and forth between the R2 position and the F6 position several times. There should be no resistance in the shift lever.
- If any of the above tests failed, the drive cable is in need of adjustment. Proceed as follows:
- Shut off the engine as instructed in the Operation section.
- Loosen the lower hex bolt on the drive cable bracket. See Figure 63.
- Position the bracket upward to provide more slack (or downward to increase cable tension).
- Retighten the lower hex bolt.
Chute Control Rod
To achieve more chute control rod engagement in the input shaft under the handle panel, the chute control rod will have to be adjusted. Refer to Figure 64. To adjust this rod, proceed as follows:
- Remove the cotter pin from the hole closest to the chute control head on the chute control input.
- Pull out the chute control rod until the hole in it lines up with the other hole in the chute control input.
- Reinsert the cotter pin through this hole and the chute control rod.
That’s all we can share for now, the article above is just a small snippet from the Craftsman SB410 CMXGBAM1054541 user guide pdf. You can download the complete user guide pdf from the link we have provided. We thank you for visiting, hopefully your yard is always clean and free from dense weeds.
